Keep Kids (and parents!) occupied this Half Term with creative, fun and easy Easter Crafts for all the family. From cards and T-shirts to bunting and bouquets, Artline has you covered. There’s a bit of DIY for everyone!
DIY and Arts & Crafts are life-saving when it comes to Easter school holidays. I mean, who doesn’t love a fun and engaging way to get creative AND create keepsakes you can treasure and look back on in years to come?! Sign us up.
That’s why here at Artline we’ve collated some of our favourite Easter crafts for you to use or take inspiration from. And best of all? They’re all super easy to replicate and make your own!
If you create any of your own Easter crafts this half term, then be sure to tag us @Artline_eu on Instagram and TikTok and use the hashtag #ArtlineInAction
And if you love these DIY craft ideas, be sure to take a look at our Instagram and TikTok, where we post content like this daily for you to get your craft on.
Easter Crafts: Bunny Bunting!
Simple Easter Cards you can create with the whole family
Happy Easter Chick!
We believe nothing beats a good old fashioned handmade card. Don’t you think they just say ‘I love you’ that much more than one quickly chosen from the supermarket? That’s why we have not one, not two but three unique designs to teach you how to create today that you can recreate and make your own with your little ones. A charming handmade gift for any family members visiting this easter.
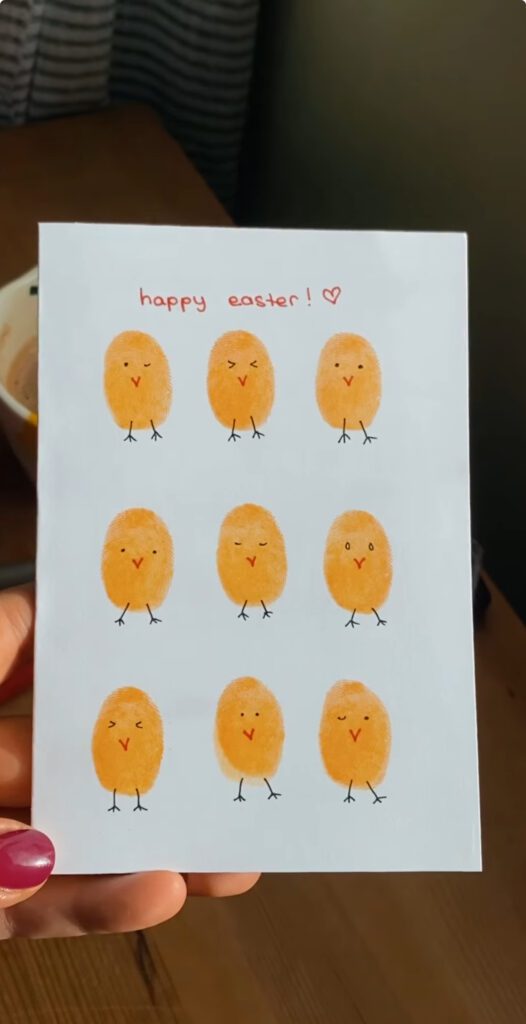
Start by folding your card in two and have the front cover facing upward
Open your Iromoyo stamp pad and place your thumb or index finder straight onto the ink (trust us here!)
Dab your finger onto your card wherever you like. You can do even rows, like us, or have your chicks running wild. The choice is yours!
Once the ink has dried, use your Drawing System pen to give your chicks feet, eyes and cute little beaks.
An easy tip to draw the beak is to create a V shape. Don’t be scared to get creative with your colours here too!
Add an easter greeting and you’re done! Wasn’t that easy? We can’t wait to see all your recreations.
This is a great way to introduce younger children into arts and crafts; an easy way to create cute designs, explore shapes and colours, and most of all have fun! Who doesn’t love a bit of finger painting?
Start by folding your card in two and have the front cover facing upward
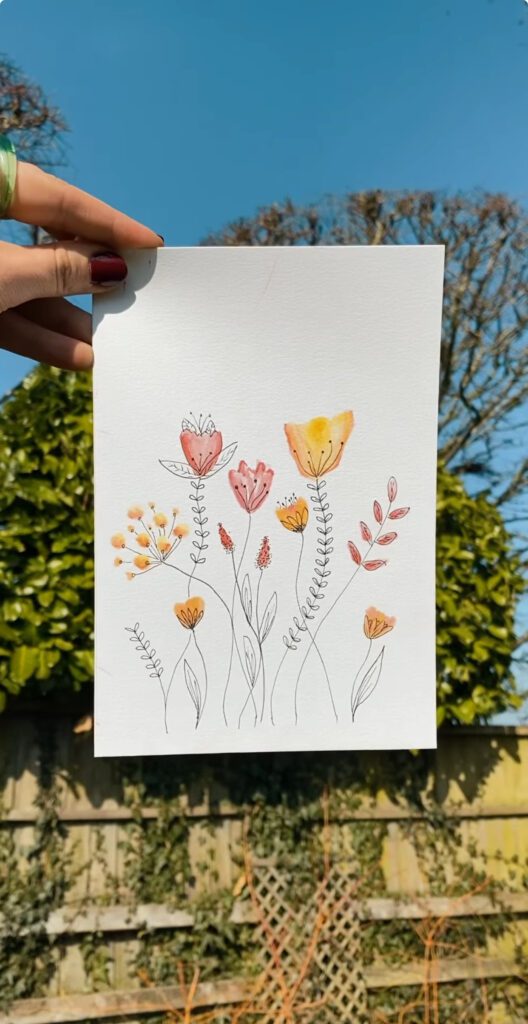
Choose your favourite Supreme Brush colours and scribble each one onto your plastic bag. This does not have to be neat but ensure each colour has its own section as we don’t want them to blend together quite yet.
Pick up your colourless blender and decide what colours you would like your first flower to be. We recommend choosing 1-2 colours for each flower.
Mix your colourless blender into the first chosen colour on your plastic bag a few times and begin drawing your flower petals on the card.
You can experiment with lots of different shapes and colours here. You can use dots, heart shapes or ‘u’ shapes for easy and beautiful results.
As you are creating your shapes, dip back into either the same or a new colour with the blender pen. If you are doing this before the ink has dried, you should be able to create seamless and beautiful shading or blending between colours!
When you’re satisfied with your petals, add some curved lines from the petals to the bottom of the page using your drawing system fine liner. These will act as your stems.
As an optional final step, you can now go in adding any details with your fine liner that you like. This could be adding leaves or textures, outlining your petals or anything you like! This is your time to make this card your own.
This one may seem a little trickier than the last but if you follow these steps, you will be left with some impressive-looking cards you can brag to your friends about. The best part about this card design is that it’s great all year long! This doesn’t have to be an Easter Craft but simply a seasonal spring card or, with some different colours or flowers, a lovely summer or Autumn card, too!
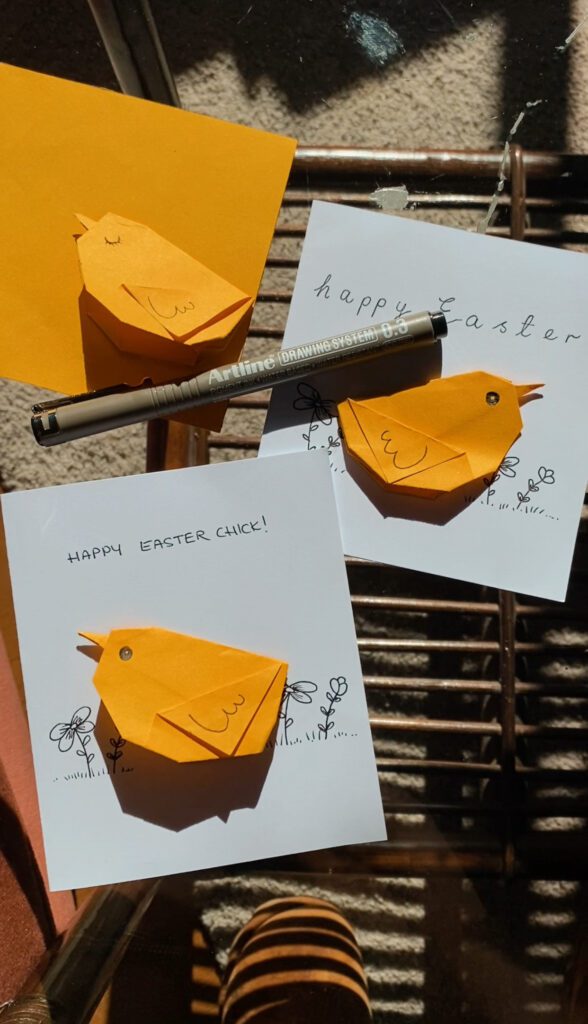
Start by folding your white card in two and have the front cover facing upward
Cut your smaller piece of colour paper (that will be used to create the chick) into a square
Fold this smaller piece of paper in half, lining each side up at the corners
Open the fold back up and position the paper so the fold is straight out ahead of and the fold we have just created is facing upwards (the corners should be bending towards you).
Fold the bottom two corners of your paper upwards so that the edges align with the previous fold. Use the images or video above to guide you.
Once you have completed this we should have a diamond shape. There will be a longer point on one end and a much shorter point on the other.
Fold both pointed ends over in the opposite direction to our previous folds. Fold the shorter end first. The longer end should poke over the end slightly when folded (this is the beak!)
We now need to fold the entire piece in half over the fold edge we created in the very first step.
Your origami should now resemble a chick! The pieces of paper sticking out on each side can be folded back to create wings and the beak can be adjusted also.
Use your Drawing system fine liner to add detail to the eye and wing. Remember you only need to add detail to one side as the other will be glues down to the card.
Use your fine liner to design the rest of the card how you like (we chose to add some simple flowers and a greeting) and use some glue to stick your little chick down.
The origami looks super sleek and impressive and once you’ve mastered the folds, you can create hundreds in no time! Origami is perfect for mess-free crafting with minimal equipment, providing endearing and impressive results. These little chicks don’t have to be used on a card, either. They even can be used as some Easter craft decoration in the home!
Gorgeous Easter Crafts: Handmade Flower Bouquet
A unique and heartfelt gift idea or treasured family keepsake.
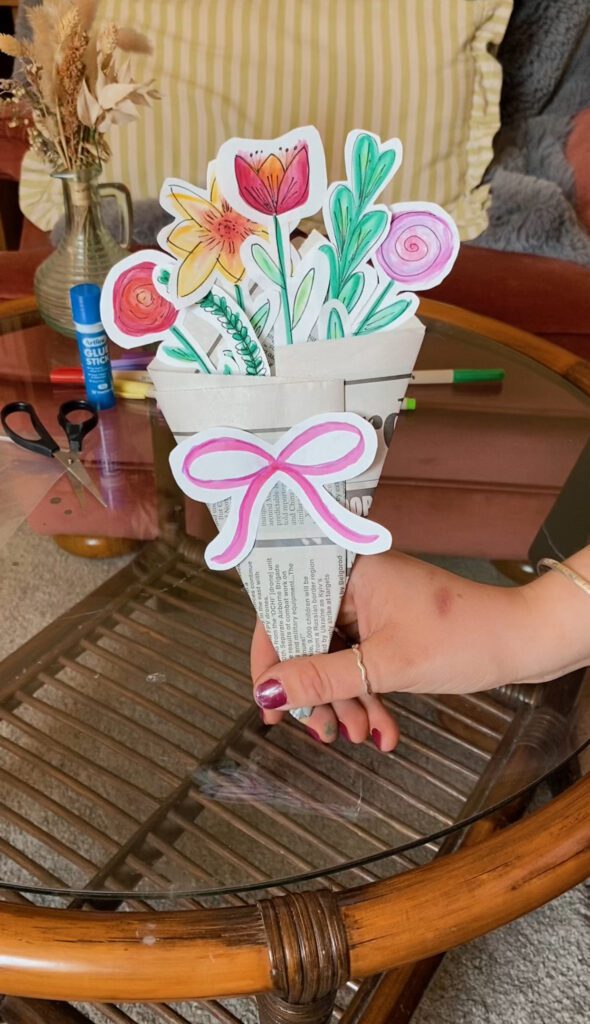
Everybody loves receiving flowers. But this DIY comes with a twist; imagine a bouquet of handmade flowers, created by the entire family with unique and vibrant varieties you’ve never seen before… No need to imagine, here’s how to create it yourself!
Start by using our supreme brush pens to create a range of colourful and beautiful flowers. Create as many or as little as you like!
Why not try getting everyone to create a few flowers each and arranging them all together in one bouquet.
You can use the technique above to create your flowers or experiment on your own here. By adding your colours to a plastic bag first and experimenting with them using the colourless blender, you will create beautiful results that are completely your own. The more unique the better.
Cut out all of your flowers. We like to leave white border around ours but the choice is completely yours.
Grab your newspaper cut-offs and fold in the sides. Use the glue to stick down the sides and leave a large enough gap at the top to slot your flowers in.
Arrange all of your flowers inside. Once you’re happy, carefully turn your piece over to the back.
Fold down the top of the newspaper at the back and glue to this edge and fold back up. This ensures none of the flowers will move around or fall out.
Draw a cute pink bow on your white card and cut out.
Turn your bouquet back round to the front and glue on your pink bow, and you are finished. Doesn’t it look gorgeous?!
This is a unique gift or precious keepsake of all family’s flowers in one bouquet. Something a bit different and will certainly last longer than a bunch of real flowers!
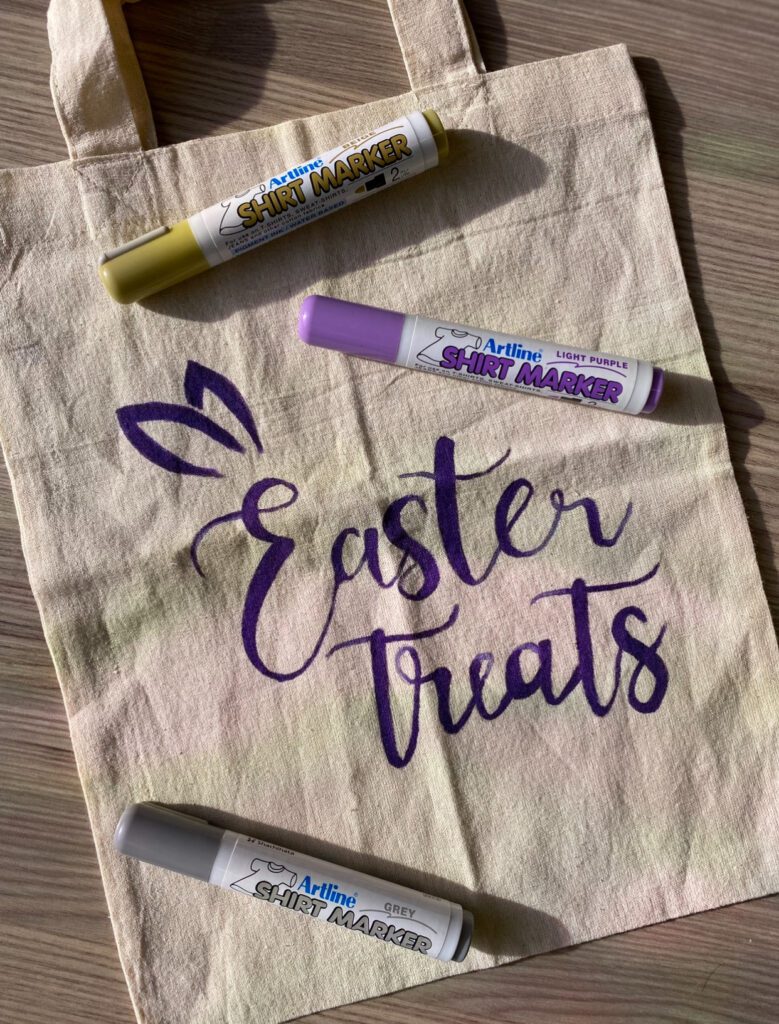
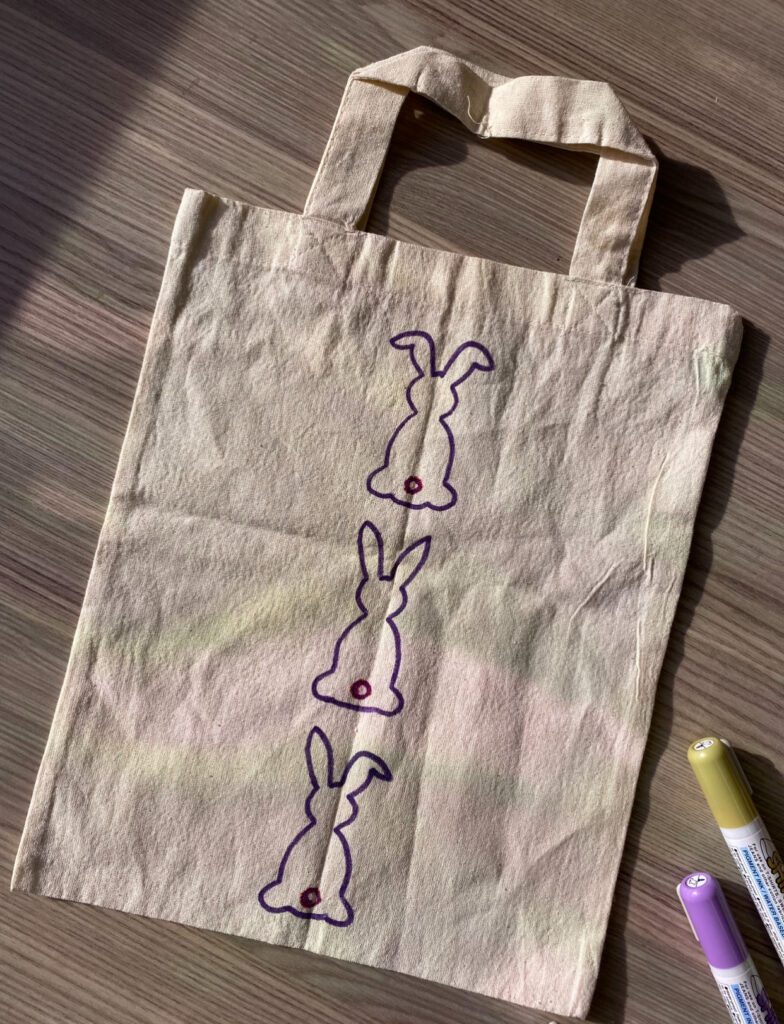
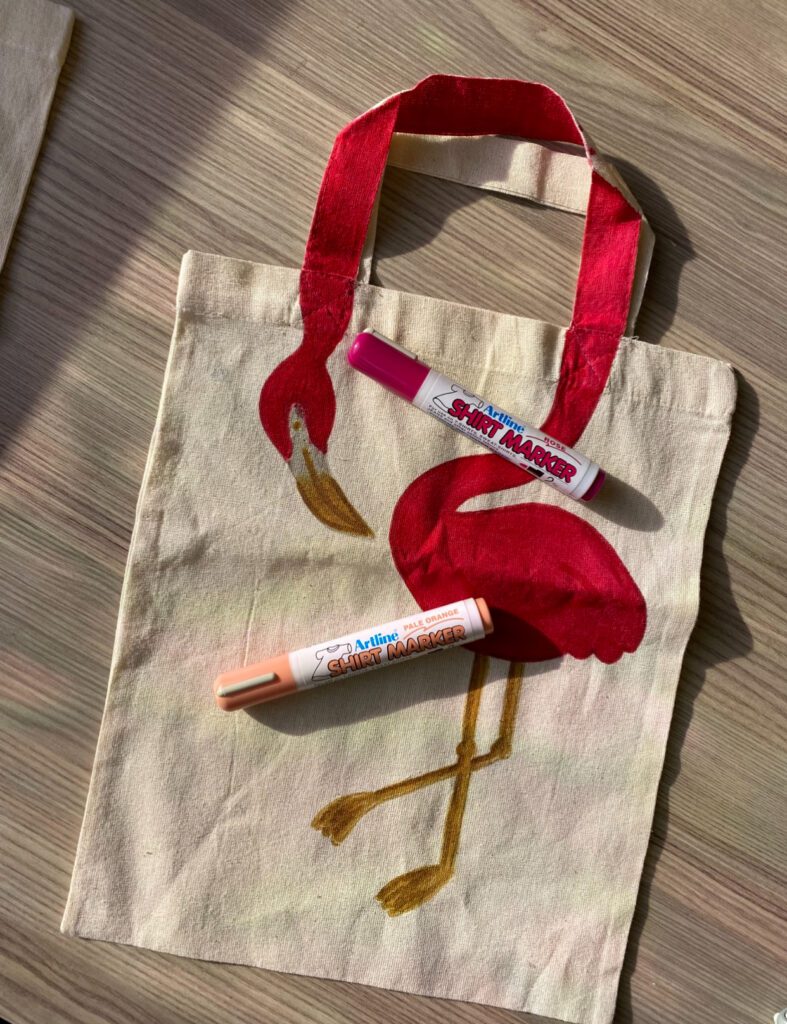
Bunting and T-Shirts are the ideal Easter Crafts for Mucky Pups!
Kids drawing on every surface you own? T-Shirt markers to the rescue! Put those little hands to crafty use creating charming easter bunting, T-shirts, or whatever your heart desires. Alternatively, this would make a great gift to any little ones in your life if they’ve already been overloaded with sugar!
The Artline T-shirt markers work on any fabric, but we also have thinner nib Laundry markers available for more intricate designs. We’ve collated some of our favourite designs to spark some inspiration: